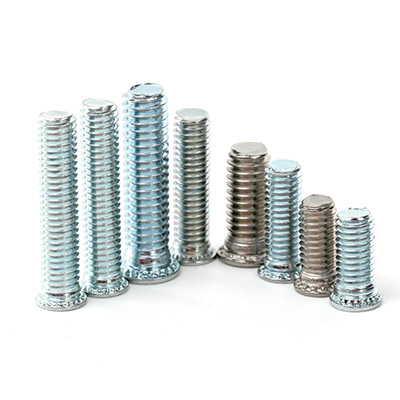
Introduction to Self-Clinching Studs
Self-clinching studs are a type of fastener commonly used in industries where secure, reliable connections are essential. These studs offer a permanent threaded solution in thin sheet metals or plastics, providing strong anchorage points for bolts, screws, or other fasteners. One of the key advantages of self-clinching studs is that they can be installed from one side of the material, eliminating the need for additional hardware or tools that would typically be required for other types of threaded fasteners.
In this article, we will guide you through the process of installing a self-clinching stud, explain its features, and explore the best practices for successful installation. Whether you're working in electronics, automotive, aerospace, or manufacturing, this guide will help you achieve a reliable, permanent connection with self-clinching studs.
What Is a Self-Clinching Stud?
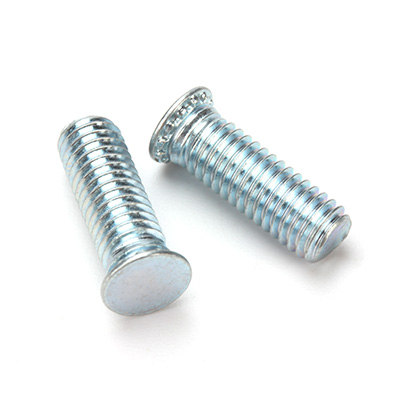
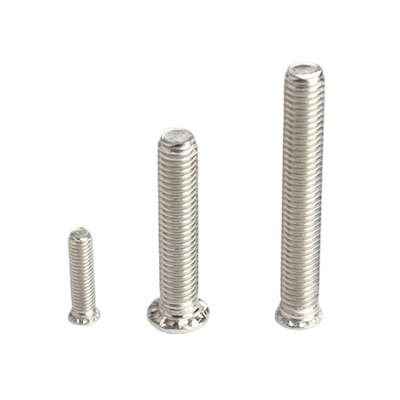
A self-clinching stud is a fastener designed to create a secure, permanent thread in thin or soft materials. It consists of a threaded shaft and a flange at one end, which allows the stud to embed itself into the material when pressure is applied. Once installed, the flange prevents the stud from rotating, and the threaded portion accepts bolts or nuts for secure fastening.
Self-clinching studs are commonly used in sheet metal, plastic, and other lightweight materials where creating a reliable, threaded hole would be challenging. These fasteners are ideal for use in tight spaces, providing a strong, lasting hold without requiring access to both sides of the material.
How Do Self-Clinching Studs Work?
Self-clinching studs work by utilizing a combination of compression and deformation to embed the stud into the material, creating a permanent hold. Here's an overview of how the installation process works:
-
Preparation of the Material: The first step in installing a self-clinching stud is preparing the material. The sheet metal or plastic needs to be drilled with a hole that matches the size of the stud. The hole should be slightly larger than the stud's shaft but smaller than the stud's flange. Accurate hole sizing is crucial for ensuring a proper fit.
-
Inserting the Stud: Once the hole is prepared, the self-clinching stud is inserted into the hole. The flange of the stud should rest against the surface of the material, with the threaded portion facing outward.
-
Clinching Process: To install the stud, pressure is applied using a clinching tool, such as a press or a pneumatic tool. As the tool applies force, the stud’s body is compressed, causing the material to deform around the shaft and secure the stud in place. This process creates a tight, permanent hold that ensures the stud will not loosen or rotate over time.
-
Thread Formation: After installation, the stud's threaded portion is exposed, allowing it to accept bolts, screws, or nuts. The thread remains intact, even under high loads and vibrations, making it a reliable fastening solution.
-
Final Positioning: Once the stud is installed, it is securely anchored in place, ready for use in a variety of applications. The flange prevents any movement, and the threaded shaft provides a secure connection for other fasteners.
Types of Self-Clinching Studs
Self-clinching studs come in a range of sizes and designs, each tailored to specific applications. The most common types include:
-
Flush-Mount Self-Clinching Studs: These studs are designed to sit flush with the surface of the material after installation. They are often used in applications where a smooth surface is required, such as in electronics or automotive panels.
-
Heavy-Duty Self-Clinching Studs: These studs are designed for use in thicker materials and high-stress applications. They provide a strong, reliable connection in demanding environments, such as aerospace, automotive, and industrial manufacturing.
-
Miniature Self-Clinching Studs: These smaller studs are ideal for applications that require compact fasteners, such as in small electronics or precision equipment. They offer the same benefits as standard studs but are designed for use in tighter spaces.
-
Locking Self-Clinching Studs: Some self-clinching studs feature a locking mechanism that ensures the stud stays in place, even under heavy loads or vibrations. These studs are often used in environments where movement or vibration could cause a standard stud to loosen.
-
Vibration-Resistant Self-Clinching Studs: These studs are designed with features that minimize the risk of loosening due to vibration. They are commonly used in automotive, aerospace, and military applications where vibration can be a significant issue.
Benefits of Using Self-Clinching Studs
Self-clinching studs offer several advantages that make them ideal for various applications:
-
No Need for Access to Both Sides: Unlike traditional fasteners that require access to both sides of the material, self-clinching studs can be installed from one side, making them perfect for applications with limited access or where the back side is inaccessible.
-
Time-Efficient Installation: Self-clinching studs are easy to install and require minimal tools, making the installation process faster and more efficient compared to other types of fasteners.
-
Strong and Reliable: Once installed, self-clinching studs provide a strong, permanent connection that can withstand high levels of torque, vibration, and stress. This makes them ideal for use in high-performance and industrial applications.
-
Space-Saving: Self-clinching studs provide a compact, secure fastening solution that doesn’t require additional space for nuts or washers. This can be especially valuable in tight or limited spaces.
-
Durable and Long-Lasting: Self-clinching studs are made from high-quality materials, making them durable and resistant to corrosion, wear, and fatigue. This ensures a long lifespan even in harsh conditions.
Applications of Self-Clinching Studs
Self-clinching studs are used across a wide variety of industries due to their versatility and strength. Some of the primary applications include:
-
Electronics: In the electronics industry, self-clinching studs are used to attach circuit boards, enclosures, and other components. They provide a secure threaded connection without the need for additional hardware.
-
Automotive: Self-clinching studs are commonly used in automotive manufacturing to create strong, reliable fasteners in sheet metal components, such as body panels, trim, and dashboards.
-
Aerospace: In aerospace applications, self-clinching studs provide secure fastening solutions for lightweight materials, ensuring that components remain firmly in place even under extreme conditions.
-
Industrial Manufacturing: Self-clinching studs are used in a variety of industrial manufacturing settings, including machinery assembly, equipment installation, and structural applications.
-
Medical Equipment: In the medical device industry, self-clinching studs are used to securely attach components to housings and enclosures. Their precision and durability ensure the safe and effective operation of medical devices.
How to Install Self-Clinching Studs: Step-by-Step Guide
-
Step 1: Select the Right Stud: Choose the appropriate self-clinching stud based on the material thickness and application requirements. Ensure the stud is compatible with the material you are working with.
-
Step 2: Drill the Hole: Using a drill bit, create a hole in the material that corresponds to the stud size. The hole should be slightly larger than the stud shaft but smaller than the stud’s flange.
-
Step 3: Insert the Stud: Place the self-clinching stud into the drilled hole, ensuring the flange is flush with the material’s surface.
-
Step 4: Apply Pressure: Using a press or pneumatic tool, apply pressure to the stud. This will cause the material to deform and secure the stud in place.
-
Step 5: Verify Installation: After installation, check the stud to ensure it is properly clinched into place and the threads are accessible.
Conclusion
Self-clinching studs are an essential fastener for creating secure, permanent connections in thin materials. Their ease of installation, strength, and versatility make them ideal for a wide range of applications, from electronics to aerospace. By following the steps outlined in this guide, you can ensure proper installation and achieve reliable, long-lasting connections in your projects.
